How to Organize Alerts with Spaces

Spaces are the best way to keep your alerts organized, collaborative, and secure. This guide shows you how to create and use spaces to manage your monitoring workflows.
Why Use Spaces?
As you create more alerts, your dashboard can get crowded. Spaces act like folders, allowing you to group related alerts. Common use cases include:
By Client: Create a private space for each client you monitor.
By Team: A public #sales space for lead-gen alerts, and a private #product space for competitor research.
By Topic: Group all alerts related to AI industry news or market trends.
1. Creating a New Space
You can create a new space right from the sidebar.
In the sidebar, click the + icon next to the "Spaces" heading.
The "Create New Space" dialog will appear.
Name your space: Use a short, descriptive name (e.g., acme-client, competitors).
Set visibility:
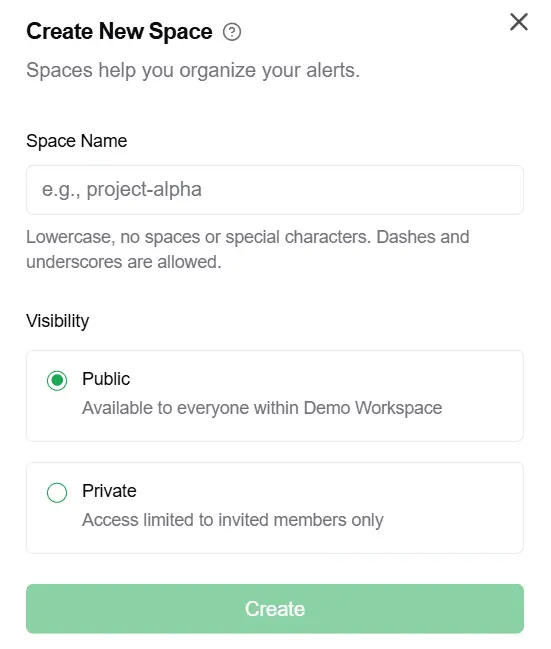 Public: Anyone in your workspace can see this space and the alerts inside.
Private: Only people you explicitly invite can see this space.
2. Adding Alerts to a Space
Once your space is created, you can start adding alerts to it.
Create a New Alert: Navigate to your new space by clicking its name in the sidebar. Any alert you create here using the "New Alert" button will automatically be added to this space.
Move an Existing Alert: You can move an alert from "My Alerts" or another space into your new space. For detailed steps, see our guide on Moving and Cloning Alerts.
A Note on Private Spaces
When you create a private space, you are initially the only member. To collaborate with teammates, you must invite them.
 To invite members: Click the "Members" tab within the space's settings to add other workspace users.