How to Create a Custom List Alert Group

A Custom List Alert Group is the most flexible way to monitor a large number of entities at once. You can upload a list of companies, websites, keywords, or any other items, and AlertBrew will create and monitor an individual alert for each one.
1. Go to an Alerting Space
Navigate to "My Alerts" or any other Space where you want to create the alert group.
2. Start a New Alert Group
 Click the "New Alert" button and select "New Alert Group" from the dropdown. Then, choose "Custom List" as the source.
3. Name Your Group
Give your alert group a descriptive name, like "Portfolio Companies" or "Target Accounts".
4. Build Your List
This is where you define the entities you want to monitor. You can add data in two ways:
Grid View (Recommended): Use the simple spreadsheet-like interface.
Click "Add Row" to add new items.
Click "Add Column" to add more variables (e.g., website, CEO name).
You can rename the columns to give them meaningful names (e.g., "Company Name", "Website URL").

Text View: Paste your data from a spreadsheet or CSV file.
Each line represents a new item.
Separate variables with commas.
Example: Acme Inc., acme.com, Stark Industries, starkindustries.com, Wayne Enterprises, wayne-ent.com.
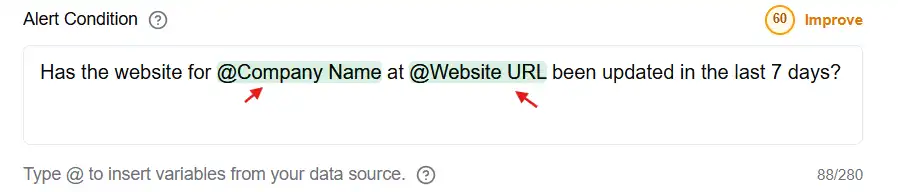
5. Write Your Alert Condition
Write the condition you want to check for each item in your list. Use the variables you defined by typing @ to bring up a list of your column names.
Example: "Has the website for {{Company Name}} at {{Website URL}} been updated in the last 7 days?"
 6. Configure Schedule & Notifications
Set how often the alerts should run and who should be notified when a match is found.
7. Create and Activate
Click "Create Alert Group". AlertBrew will create individual "child" alerts for each row in your list. Activate the group to start monitoring.
Note: You can edit your list at any time. When you add or remove items, AlertBrew will automatically create or deactivate the corresponding alerts in your group.